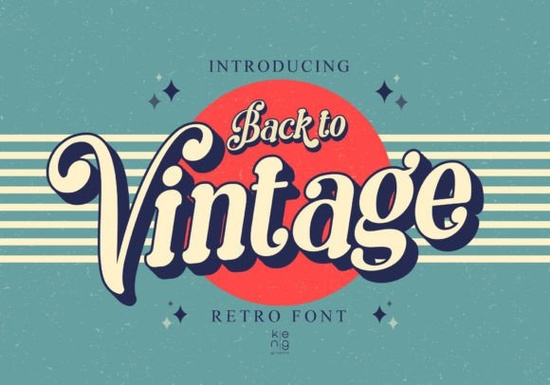
When designing apparel or posters that need a nostalgic feel, finding the right typography is half the battle. The Back to Vintage Font brings a distinct 1960s, 70s, and 80s aesthetic directly to your canvas. Crafters, print-on-demand sellers, and small business owners often use this specific retro typeface to create eye-catching headers and logos. Instead of sharp, aggressive edges, the letters feature soft, rounded corners that make any text feel approachable and classic. If you are looking to capture an authentic throwback vibe, it is an excellent starting point for your next creative collection.
What kind of projects work best with 70s and 80s retro typography?
Nostalgic lettering is incredibly versatile for both digital and physical products. Print-on-demand sellers frequently use these styles for t-shirt graphics, tote bags, and enamel pin designs. The bold, rounded shapes ensure the text remains legible from a distance, which is exactly what you need for retail merchandise.
Creative hobbyists also love using this style for scrapbooking, vinyl decals, and party invitations. Because the font has a built-in personality, you do not need to add excessive graphics to make your design pop. A simple quote set in this typeface can easily become the focal point of a greeting card or a ceramic coffee mug.
How do the rounded corners change the mood of a design?
Sharp angles often communicate modern or industrial themes, while soft edges create a friendly, relaxed atmosphere. The rounded corners in this font mimic the classic bubble letters and soft signage of the late 20th century. This makes it a highly effective choice for brands that want to appear welcoming, playful, or community-focused.
When setting text for a bakery logo or a children's clothing line, the smooth curves help convey warmth. Just remember to give the letters enough breathing room. Display fonts with unique shapes need adequate tracking, or letter spacing, to ensure the soft edges do not blur together when printed at smaller sizes.
Can you pair this display font with other typefaces?
Since this is a highly stylized display font, it works best when paired with simpler, highly readable secondary fonts. If you need a handwritten look for subheadings, you might try handwritten display options like Motcha to complement the main title. For projects requiring a heavier, more solid base, thicker, bolder styles such as Harlow Chunky provide excellent visual contrast.
If your project leans towards a softer, more romantic aesthetic, pairing your retro header with script variations like Hello Angela can balance the chunky retro vibe. Alternatively, for highly structured or architectural designs, you might contrast the rounded edges with geometric layouts found in Brick Stacked. Always keep a basic rule in mind: let the vintage font be the star, and use basic sans-serif fonts for the body copy.
What settings should you use in Cricut or Silhouette?
When cutting this font with a machine, the smooth curves are generally easy to weed. However, you should take a few precautions to get the cleanest results. Crafters know that preparation is just as important as the cutting process itself.
- Weld the letters: If you are writing a word and overlapping the rounded edges, make sure to weld the text in your software. This ensures the machine cuts the entire word as a single, continuous shape.
- Adjust the line thickness: The soft corners can sometimes appear thin when scaled down for small decals. Use the offset tool to create a slightly thicker border around the text before sending it to the cutting mat.
- Choose the right material: Smooth vinyl or iron-on works best. Highly textured materials might hide the subtle rounded details that give the typeface its unique character.
Quick checklist before starting your project
Before you send your design to the printer or cutting machine, run through these practical steps to save time and materials:
- Verify that you have the correct file formats installed for your specific graphic design software or cutting program.
- Restart your computer or application if the new typeface does not appear in the drop-down menu immediately.
- Do a test print on standard copy paper to check how the soft corners look at the actual physical size.
- Review your commercial license terms on the marketplace to ensure you are cleared to sell physical merchandise featuring the typography.
Taking a few minutes to prep your files will help you achieve a professional finish on every single retro creation.
Try It Free Thick Honey Duo Font for Creative Print Projects
 Hunter's K-Pop Fonts for Music & Design Projects
 Jake Font: Creative Design Projects & Free Downloads
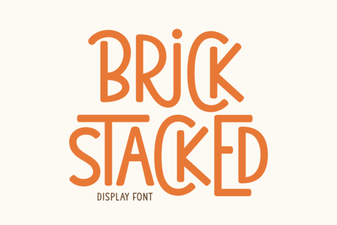 Building Creative Structures with Brick Fonts
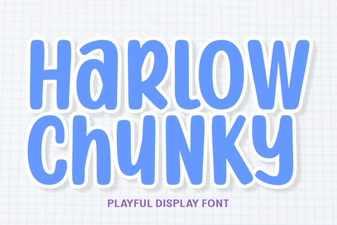 Design with the Chunky Harlow Font Style
 Floral Typography for Your Summer Design Projects